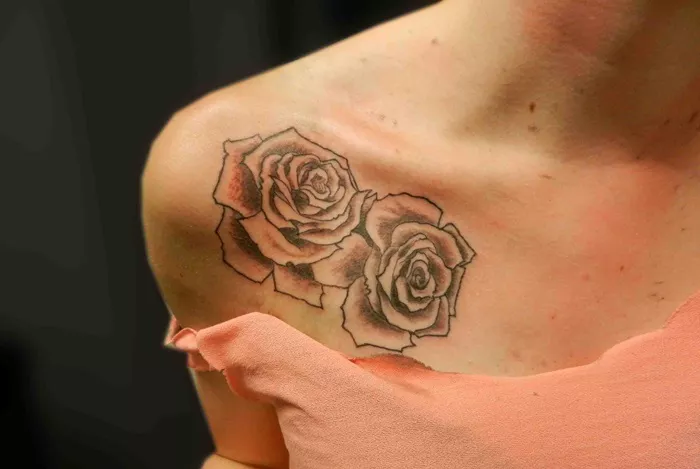
Drawing a rose for a tattoo design is a skill that many aspiring tattoo artists and enthusiasts strive to master. The rose, with its intricate petals and deep symbolic meaning, is one of the most popular tattoo designs. Whether you are a beginner or a seasoned artist, this guide will take you through the essential steps to draw a stunning tattoo rose. We will cover everything from understanding the anatomy of a rose to adding details that make your design stand out.
Understanding the Anatomy of a Rose
Before you start drawing, it’s important to understand the basic structure of a rose. A rose is composed of several parts, each with its unique features:
Petals: The petals are the most prominent part of the rose and can vary in number and shape. They are usually rounded with a slight curl at the edges.
Sepals: These are the green, leaf-like structures beneath the petals. They protect the bud before it opens.
Stem: The stem is the support structure for the rose and usually includes thorns.
Leaves: Rose leaves are usually oval-shaped with serrated edges. They grow in pairs along the stem.
Materials You’ll Need
To draw a tattoo rose, gather the following materials:
Pencils (HB for sketching, 2B-4B for shading)
Eraser
Fine liners or ink pens
Drawing paper or sketchbook
Reference images of roses
Step 1: Start with the Basic Shapes
Begin by sketching the basic shapes that will form the foundation of your rose. Use light pencil strokes to outline these shapes:
Circle: Draw a small circle at the center. This will be the base of your rose’s innermost petals.
Oval: Around the circle, draw an oval shape. This will guide the outer petals.
Guidelines: Draw a vertical line through the center of the circle and oval.
This helps maintain symmetry as you add petals.
Step 2: Draw the Center of the Rose
The center of the rose is where the petals are tightly packed. Start by drawing small, curved lines inside the circle. These lines should spiral outward, representing the tightly coiled petals at the rose’s core. The lines should overlap slightly, giving the impression of depth.
Step 3: Add the Inner Petals
Next, begin adding the inner petals around the central spiral. These petals should follow the shape of the oval but can vary in size and shape. The key is to make the petals appear natural, with some curling inward and others slightly overlapping.
Step 4: Draw the Outer Petals
Once the inner petals are complete, move on to the outer petals. These should be larger and more open than the inner petals. Use the guidelines to help position these petals symmetrically around the rose. Vary the shapes slightly to avoid a rigid appearance, as natural roses have petals that are not perfectly uniform.
Step 5: Add the Sepals
Beneath the rose, draw the sepals. These should be narrow, pointed shapes that extend from the base of the flower. Typically, a rose has five sepals, but you can add more or fewer depending on your design. Ensure that the sepals appear to be supporting the petals above them.
Step 6: Draw the Stem and Leaves
Extend a line downwards from the base of the sepals to create the stem. Add thorns along the stem by drawing small, triangular shapes. Then, sketch the leaves along the stem. Rose leaves typically grow in pairs and have a serrated edge, so be sure to include these details.
Step 7: Refine the Details
With the basic structure in place, begin refining your drawing. Add more detail to the petals, such as slight veins or shading to indicate depth. Define the edges of the sepals, stem, and leaves, making them sharper and more distinct.
Step 8: Add Shading and Texture
Shading is essential to bring your tattoo rose design to life. Start by identifying the light source in your drawing and shade the areas of the rose that would naturally be in shadow. Use a soft pencil or shading tool to create gradients on the petals, making them appear more three-dimensional. Add texture to the leaves by drawing fine veins and shading the edges.
Step 9: Inking Your Design
Once you are satisfied with your pencil drawing, go over it with a fine liner or ink pen. Carefully trace the lines of your rose, adding any final details as you go. Allow the ink to dry completely before erasing any remaining pencil lines. Inking your design makes it bold and ready for use as a tattoo template.
Step 10: Adding Color (Optional)
If you plan to add color to your rose, decide on your color scheme before you begin. Traditional tattoo roses are often red, but you can experiment with different colors to suit your design. Use colored pencils, markers, or digital tools to apply color. Remember to add shading and highlights to maintain the three-dimensional effect.
See also: What Does a Rose and Butterfly Tattoo on Fire Mean?
Final Tips for Drawing a Tattoo Rose
Practice Regularly: Drawing roses can be challenging, but practice makes perfect. Keep practicing different styles and sizes of roses to improve your skills.
Use References: Always have reference images on hand. Studying real roses will help you understand how petals fold and overlap.
Experiment with Styles: Don’t be afraid to experiment with different artistic styles. Whether you prefer a realistic, traditional, or abstract approach, there’s a tattoo rose style that suits you.
Conclusion
Drawing a tattoo rose is a rewarding experience that allows you to express creativity and hone your artistic skills. By following this step-by-step guide, you can create a beautiful rose design that is ready to be inked. Remember, the key to mastering rose drawing lies in understanding the flower’s anatomy, practicing regularly, and paying attention to detail. With time and dedication, you’ll be able to create stunning rose tattoos that capture the beauty and elegance of this timeless flower.

