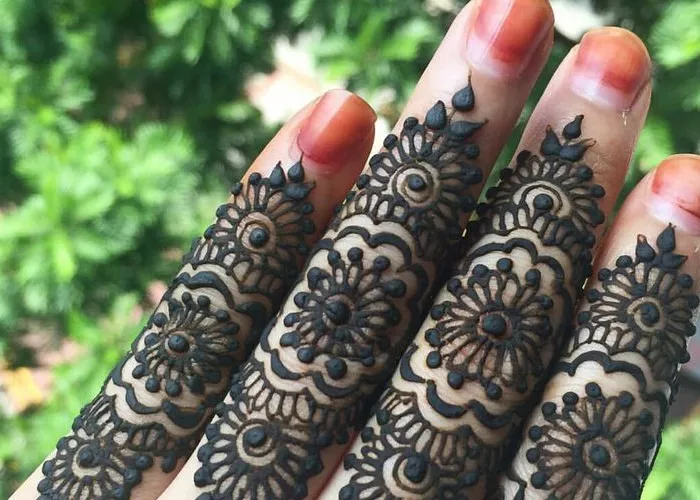
Henna tattoos have gained global popularity as a temporary, artistic expression rooted in rich cultural traditions. Originating in the Middle East, South Asia, and Africa, henna (made from the Lawsonia inermis plant) is an all-natural dye that temporarily stains the skin, creating intricate designs that typically last one to three weeks. Henna tattooing is more than an aesthetic practice; it holds deep cultural significance in ceremonies, celebrations, and rites of passage. For beginners, learning to create henna tattoos offers an opportunity to engage in this beautiful art form while exploring its cultural history.
This guide will take you step-by-step through the basics of henna tattooing, from understanding the materials to mastering beginner-friendly designs. By the end, you’ll have the confidence to create stunning henna tattoos, whether for personal enjoyment or to share your artistry with others.
The Basics of Henna Tattooing
What Is Henna?
Henna is a natural dye derived from the leaves of the Lawsonia inermis plant. The leaves are dried, ground into a fine powder, and mixed with a liquid (usually lemon juice or tea) to create a paste. Essential oils like eucalyptus or lavender are sometimes added to enhance the color and scent. Once applied to the skin, the paste is left to dry and stain the skin beneath.
Why Henna Tattoos?
Henna tattoos are non-permanent and chemical-free, making them an excellent option for body art without the commitment of ink tattoos. They are ideal for festivals, weddings, or personal adornment and allow for creative experimentation.
Essential Materials
To start henna tattooing, you’ll need:
Henna powder: Purchase from a reputable supplier to ensure its authenticity.
Mixing liquid: Lemon juice, tea, or water.
Essential oils: Optional, for improving stain quality.
Applicator cone or bottle: For precision in applying designs.
Plastic wrap or cling film: To seal the paste for deeper staining.
Stencil (optional): For beginners who need guidance with patterns.
Step-by-Step Guide for Henna Tattoo Beginners
Preparing the Henna Paste
Creating a good henna paste is crucial to the success of your designs. Here’s how:
- Sift the Powder: Use a fine mesh sieve to ensure a smooth, lump-free paste.
- Mix the Liquid: Gradually add lemon juice or tea to the henna powder while stirring until the consistency is like toothpaste.
- Let it Rest: Cover the bowl with plastic wrap and let the paste rest for 6-12 hours to allow dye release.
- Add Essential Oils: For a richer stain, mix in a few drops of eucalyptus or tea tree oil.
- Load the Applicator: Fill a cone or applicator bottle with the paste, ensuring no air bubbles. Seal the tip and store in a cool place if not using immediately.
Preparing the Skin
For optimal results, the skin must be clean and prepped:
- Wash and Dry: Clean the area with soap and water to remove oils or lotions.
- Exfoliate: Lightly scrub the area to remove dead skin cells.
- Avoid Oils: Skip moisturizers before applying henna, as they can hinder the stain.
- Mark the Design (Optional): Use a pencil or stencil to outline the area for better precision.
Applying Henna Designs
This is where creativity shines! For beginners:
- Start Simple: Practice with basic patterns like dots, lines, and floral motifs.
- Steady Hands: Hold the applicator like a pen and apply consistent pressure for even lines.
- Work Slowly: Henna dries quickly, so precision is key.
- Layer the Design: Begin with the main outline and fill in details afterward.
Tips for Beginner Designs
- Use a stencil for intricate patterns.
- Trace first with a washable marker if freehand feels daunting.
- Stick to geometric shapes and symmetrical patterns for ease.
Aftercare for Long-Lasting Tattoos
Proper care ensures vibrant and long-lasting designs:
- Let It Dry: Leave the henna on for 4-6 hours (or overnight for best results).
- Seal the Paste: Once dry, dab a sugar-lemon solution over the design to keep it moist.
- Scrape, Don’t Wash: Gently scrape off the dried paste without water to reveal the stain.
- Avoid Water: Refrain from exposing the tattoo to water for the first 24 hours.
- Moisturize: Use natural oils like coconut or olive to protect and deepen the stain.
Conclusion
Henna tattooing is a rewarding art form that bridges creativity and cultural appreciation. For beginners, mastering this skill involves understanding the materials, preparing the paste and skin, practicing designs, and following proper aftercare. By starting with simple patterns and gradually advancing to complex designs, anyone can create stunning henna tattoos that celebrate this timeless tradition.
Whether you’re decorating your hands for a festival or helping a friend prepare for a special event, henna tattooing is a versatile and meaningful skill to learn. With patience, practice, and the tips in this guide, you’ll soon be on your way to becoming a confident henna artist.
Related topics:

